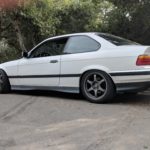
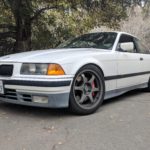
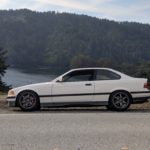
When building a car, a lot of people (myself included) forget that a fast car needs to be able to shed that speed at a moment’s notice. After going back and forth what to do with the e36 318is, we decided to take the opposite approach with our overweight Miata.
Initially we had added wider wheels and tires, then moved on to installing a Ground Control adjustable suspension. Almost 25 years old, a majority of the car’s bushings were original and tired. That meant the front end was rebuilt with new control arms, tie rods, and offset bushings. The rear end was treated to heavier duty Z4-M trailing arm bushings with limiter shims to keep the rear alignment in check. Oh, as an added bonus, all the wheel bearings were replaced…not by choice either. In the process of the suspension revamp, we noticed the front brakes were on borrowed time. We could have easily replaced the pads and rotors and called it good, but someone decided that 4-piston calipers looked a lot cooler.
Close Fitment
Big brake kits are a great way to add some serious stopping power to any car, but they do bring some fitment challenges. To work around the wheels currently installed on the car, we went with the StopTech Touring BBK designed for non-M e36 and non-M e46 cars. It’s a fixed 4-piston setup that uses e46 M3 sized rotors (325mm x 28mm). This is nice in case we need replacement rotors, as they are readily available and a simple 1-piece, unlike a lot of the custom rotor sizes found on other BBK’s.
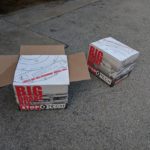
- Each side of the car gets its own box-o-parts
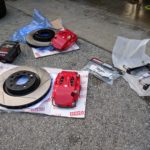
- Once out of the packaging, the StopTech kit appears to be very complete.
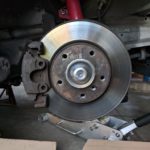
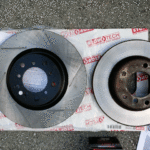
- Here’s the stock e36 non-M 286mm rotor, single piston brake setup.
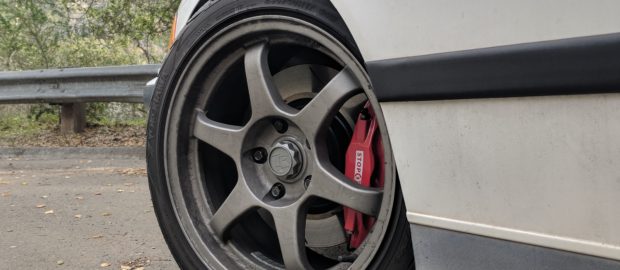
For a little over 1000 bucks from Bimmerworld, we felt that was quite reasonable for a set of new calipers, pads, rotors, and all the necessary hardware. To ensure everything would work in our car, we printed out a template to verify that the calipers would clear the 17 inch wheels currently installed. Since we already have a 12.5mm spacer on to clear the front coilovers, all was well. It should be noted that different styles of wheels may not clear due to differences in spoke designs, so it’s always best to test fit first for each application.
It took a few weeks for everything to arrive, but once delivered, we quickly set to work getting these guys installed. The StopTech kit is very comprehensive, as each part is nicely packaged. Also included is a set of instructions with step-by-step procedures to ensure installation is smooth sailing.
Hurricane Joe in the Driveway
Obviously we had to get the car up on jack stands to remove the stock front brake setup. Having done this way too many times in the past few months, this was cut down to a five minute procedure. To avoid dripping brake fluid everywhere, the caliper and lines were left attached until the new setup was ready to be connected. Don’t worry, I can assure you I still made a mess.
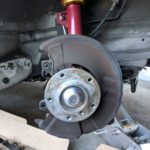
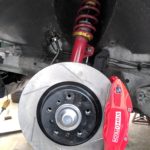
With our wheel hub bare and stripped of its brakes, the shiny new bits could start going on. The first of those pieces was the StopTech caliper carrier. Engraved on the carrier itself is the mounting directions so that it’s installed correctly with the two stock carrier bolts at ~65 lbs. Next goes on the rotor (which are directional and side specific), but they’ll flop around as the stock style BMW set screw doesn’t work with the aftermarket units. This is where wheel studs would have been really handy to have installed. Another project for the never-ending list.
- The hub assembly is all that’s left once stripped of the stock braking components.
- The new slotted rotor is 325x28mm, making the stock 286x22mm rotor look puny by comparison.
- Using the stock carrier bolts, the StopTech caliper carrier is installed into position.
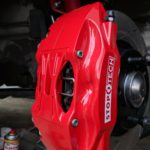
Next comes the caliper. Milton being Milton, the calipers are bright red for the entire world to see, however StopTech offers a variety of colors in case you want something a little more subtle. Using the two supplied nuts, the caliper slides on to the carrier mounting studs to be secured at 40 lbs.
Since the StopTechs are a performance oriented braking setup, they allow you to swap pads with the calipers still installed. This is performed through a removable bridge on the top of the caliper, which allows the pads to slide right into position. While not a concern for a track car, street car owners usually cringe at the sound of brake squeal. To try and minimize that annoyance, I applied a bit brake grease to the metal on metal contact points, hopefully keeping the noise in check.
Now that the caliper and rotor were installed in their new homes, the next hurdle was to get the new brake line sending fluid to the fancy red calipers. Whereas the stock style brake lines simply screw into the caliper itself, the new BBK uses a banjo fitting on the caliper itself, so it’s critical to not over-tighten the line for fear of damaging the threads. The connection to the chassis hard line installs just like stock though.
Doing the first side took me at least an hour as I was double checking the instructions and testing the fitment of everything. By the time I had to do the opposite side, it was a mere 15 minute production.
It wouldn’t be one of our projects if I didn’t make a huge mess in Will and Bruce’s driveway! With every new brake setup, bleeding the system of any air is an important step to ensure everything functions properly. Nobody wants to slam the brake pedal to only have it hit the floor, talk about nerve wracking.
In the case of these brakes, there are two bleed screws on each caliper. One for the inboard set of pistons, and another for the outboard ones. Rule of thumb when bleeding brakes is to start at the furthest point away from the master cylinder and work your way inwards. Since we are only doing the front brakes in this instance, we started with the passenger side outboard bleeder, bled the inboard side, then repeated the process on the driver side caliper. We did a couple go-arounds to make sure we got as much air out of the system as possible.
- The rotor goes on, then the meaty brake caliper attaches to the carrier studs.
- Everything assembled, bled, and ready for the wheel to go back on.
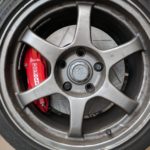
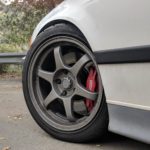
- Fitment is tight, but the 17×8.5 et40 TR Motorsport C2 wheel clears thanks to a 12.5mm hubcentric spacer.
After fumbling to get the wheel and spacer back onto the hub, the wheels were remounted on the car and we checked to make sure there were no interference. Thankfully we had measured correctly, and the wheel weights weren’t in the wrong spot on the rim itself.
Halt to the Finish
The car was back on the ground and it was time to test our new anchoring system. StopTech gives rather specific instructions for bedding the pads to the rotors. Namely a series of hard stops from 60 pmh just before coming to a complete stop, then speed back up to repeat the process. This posed two challenges: The first was find a strip of deserted road long enough to accommodate such a task. Second, and more hilarious is how repeated acceleration runs up to 60 miles and hour isn’t exactly easy with all whopping 138 horses of the 1.8 M42 powerhouse. I must say though, once the brakes were finally bedded and the pads warmed up, this car can STOP!
After recently driving Milton’s Focus RS with factory equipped Brembos,I can’t deny that those are some good brakes, granted very sensitive. By contrast, the StopTechs still require a fair amount of pedal travel, yet it’s their consistency to resist brake fade is where they shine. Doing away with the sliding caliper, along with having 39mm taller and 6mm wider rotor makes for a more inspiring braking system. Also, another thing to note is the rotor sizing was originally spec’d for an e46 M3, which is a good 400 lbs heavier than our bare bones 318, so I don’t think we’ll be cooking these brakes anytime soon.
So all these fancy parts on what is arguably one of the slowest cars in the fleet? Despite the the M42 having been relatively trouble free in this car, Milton is quite suspicious of it…then again, between Milton, Taylor, and myself, we’ve all had previous M42 engines fail catastrophically on us. With that in mind, Milton wants to eventually convert the car to a six cylinder, which is a bolt-in affair considering BMW themselves made six pot e36’s. Naturally someone is going to ask, “Why don’t you just buy a car with that engine?” Consider this: Our 318 is actually a decent example of an e36, and we already gathered a majority of the parts needed to do the conversion, so may as well work with what we have. Also, when have we not overcomplicated things?
-JC
Want to add some more stopping power to your non-M e36? Here’s the brake kit we used for this article:

