Adding digital oil pressure and temperature gauges to an e30 BMW
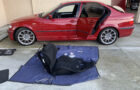
In the latest installment of taking a perfectly good working car and questionably modifying it, we head down the path of auxiliary gauges. In the land of old BMWs, being able to monitor your oil temperature and pressure seems like a good thing, especially when drivers are known to drive the snot (and oil) out of these old Bavarian hunks of steel.
A handful of the M cars got oil temperature gauges, but no oil pressure gauges outside of the factory ‘dummy light’ which only trips upon startup or when things go catastrophically wrong. Like any car dork who starts enjoying the occasional track day, being able to monitor the oiling system while hammering on the car becomes a bigger priority. So down the rabbit hole I went to install an oil temperature and pressure gauge into my 1991 318is.
Not Just Any Gauges
Logic would say to buy the appropriate gauges, wire them up, then go about your business. Unfortunately I spent way too much time overthinking how I wanted the gauges to look and eventually landed on a more complicated solution. It looks OEM-ish, but getting everything buttoned up wasn’t without its hiccups.
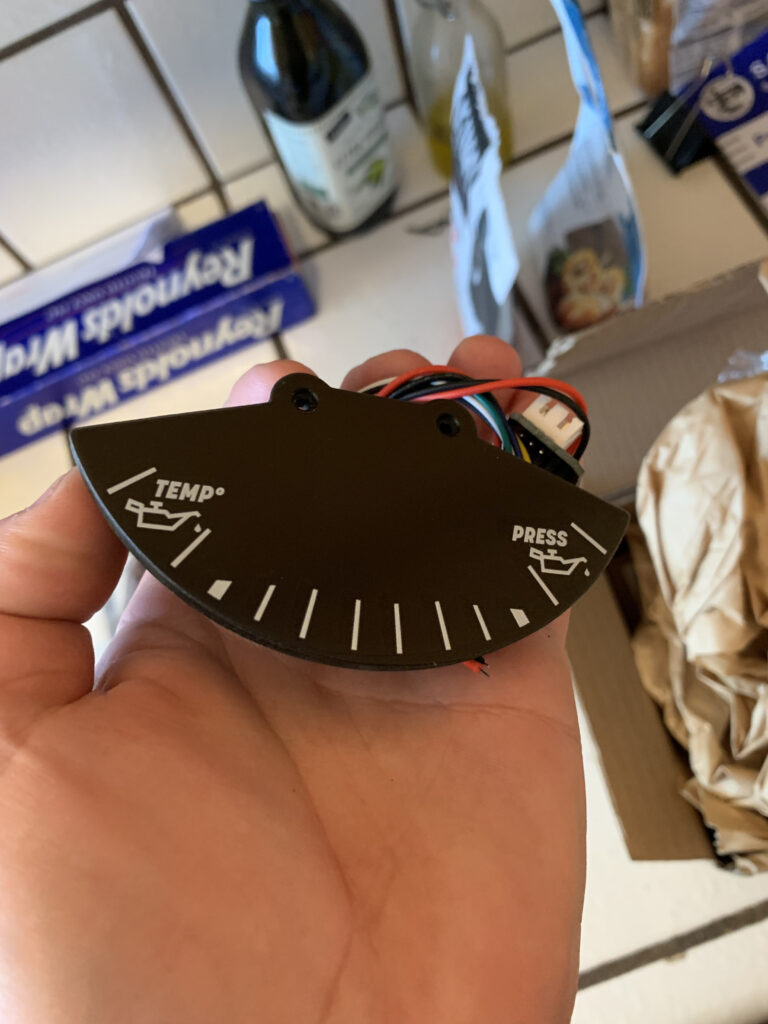
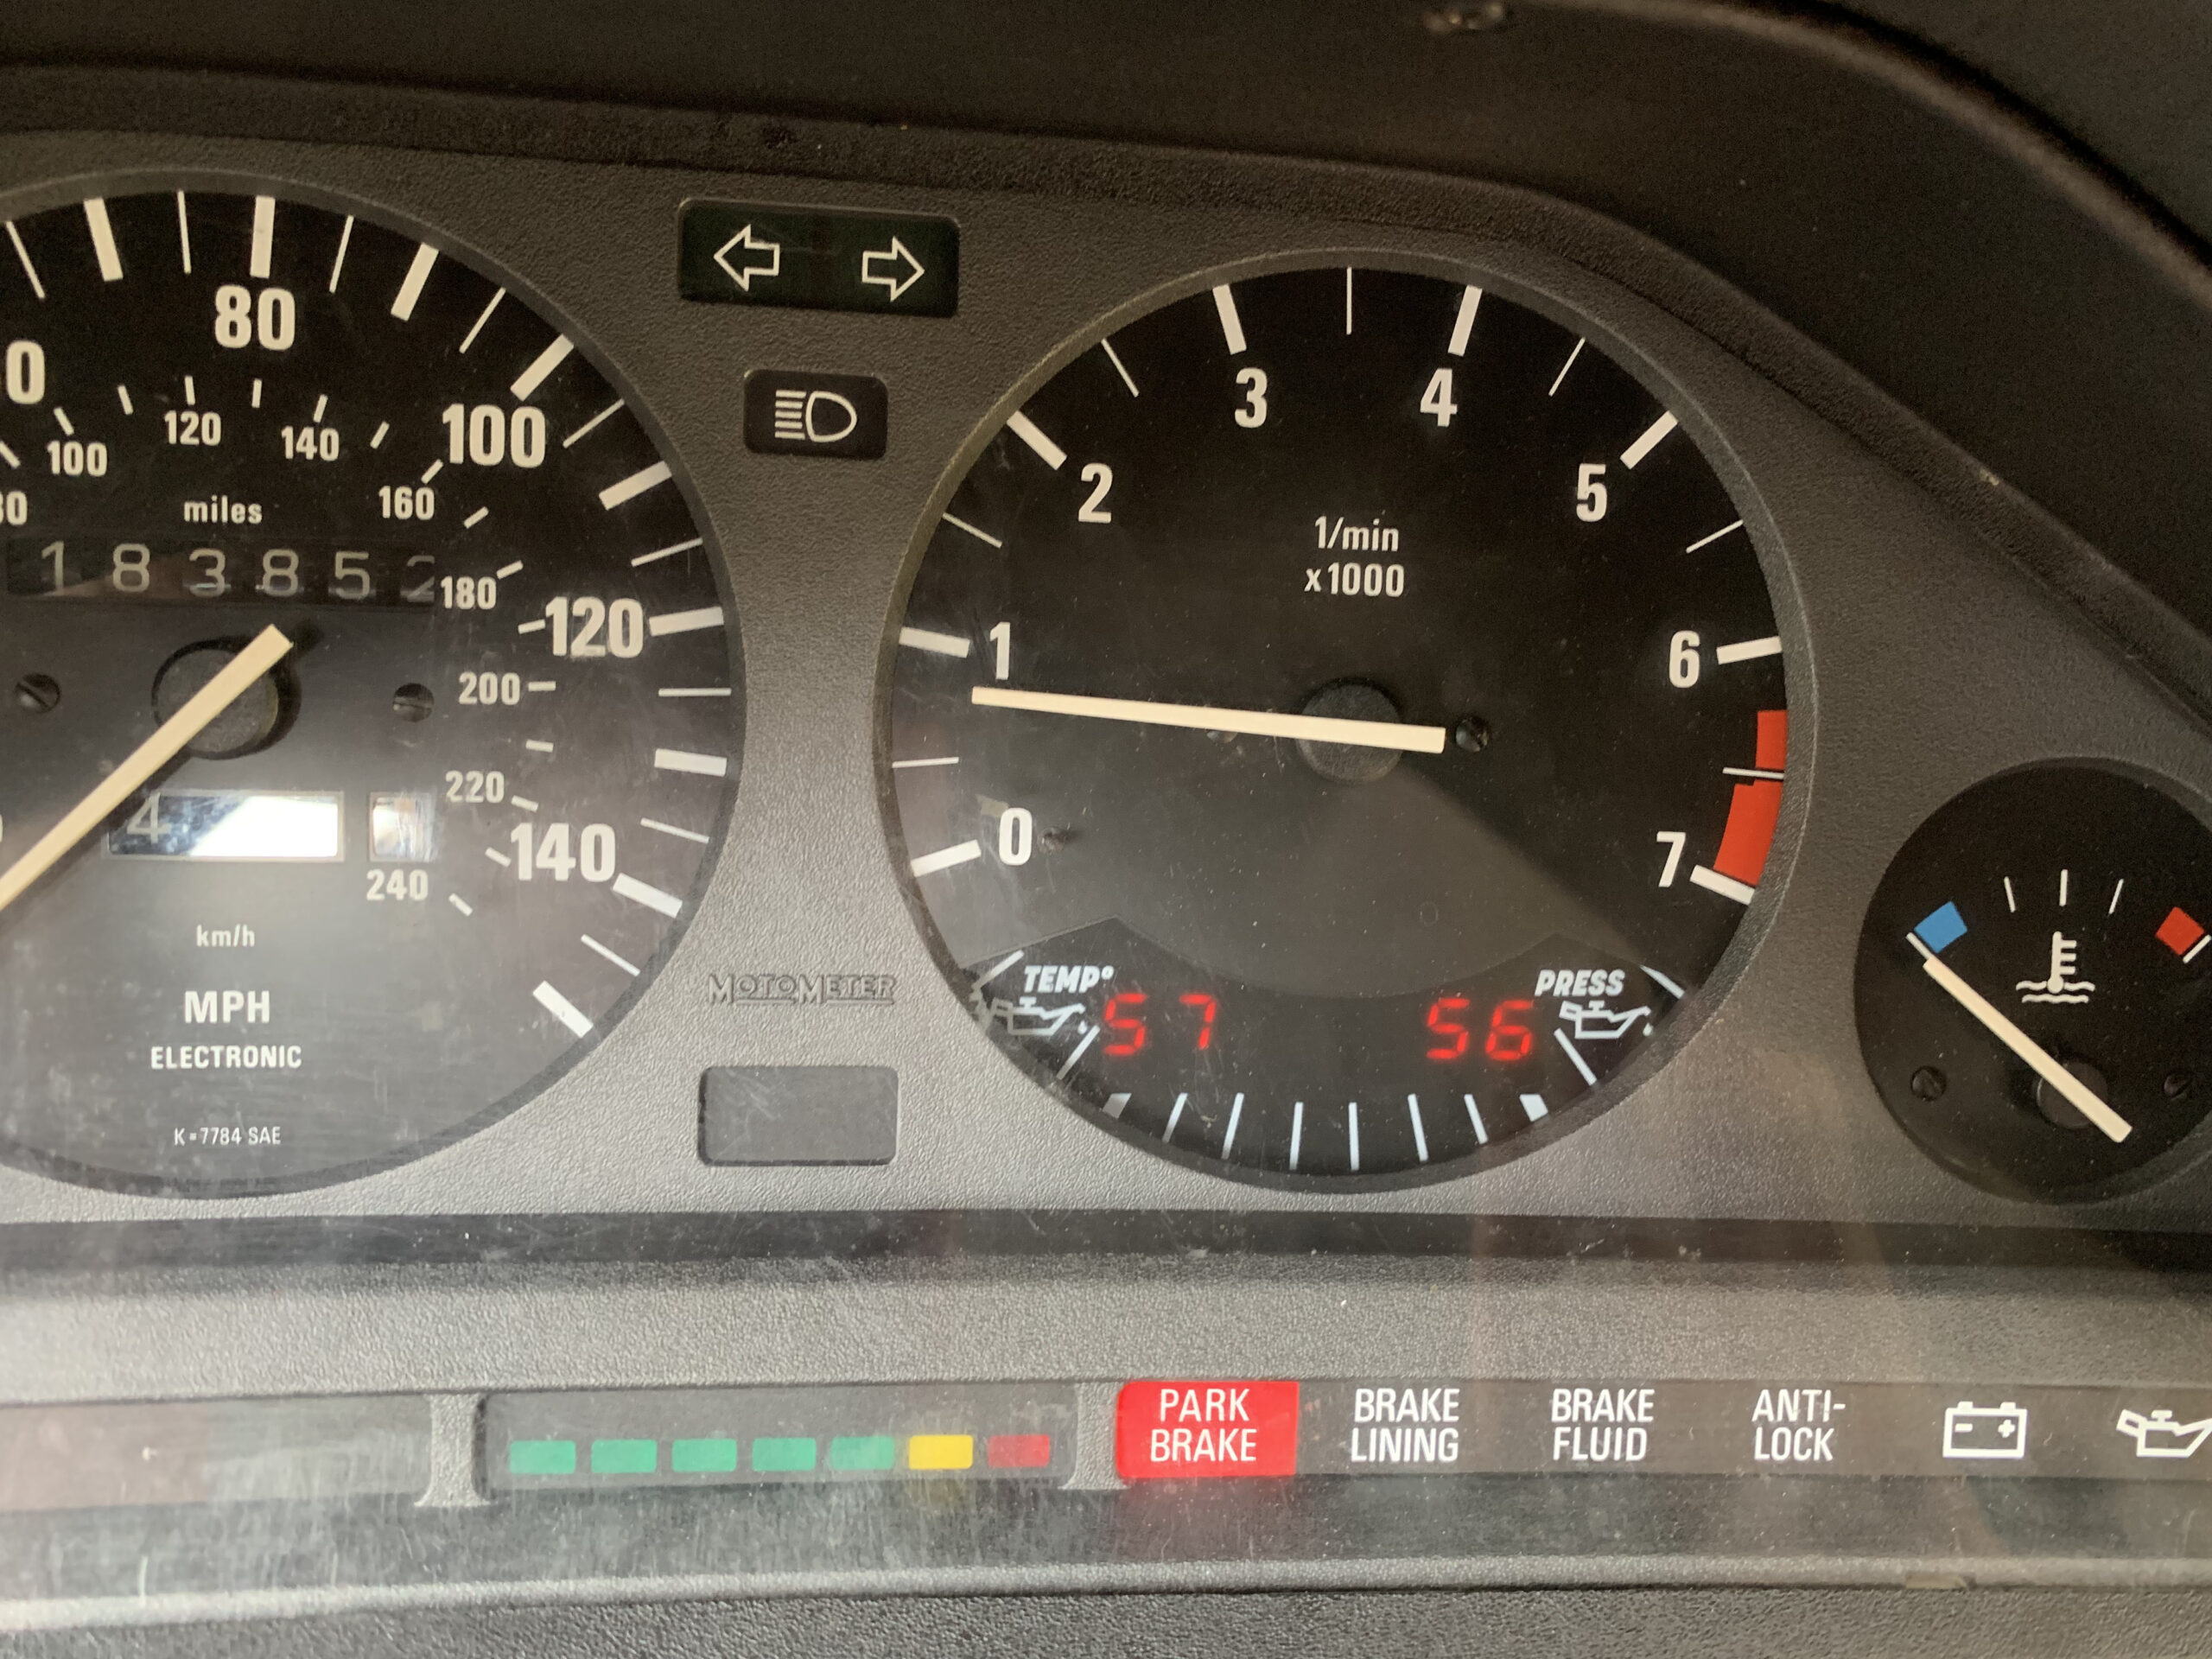
The kit I went with is produced by JR Parts in France, which replaces the MPG econometer with digital oil temperature and pressure displays. I liked this approach because the gauges remain in the same sightline of the tach, and I didn’t have to compromise space elsewhere to install an obvious set of aftermarket gauges. Since the car is still a street car, if I can keep the OEM plus aesthetic going, then I’m all for it.
The other component I was seeking is reversibility. In this case if I didn’t like the setup, I could always return things back to stock if needed. In my case, it would be a matter of swapping a stock tach/econometer back into the cluster, fishing out the kit specific wiring, and the oil filter cap with the sensor ports (M20 and S14 cars use a sandwich plate instead).
Destruction Commences
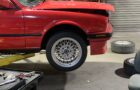
Once the kit arrived after a week or two in transit, I was ready to get to work. First I pulled the cluster to begin modifying the tachometer/econometer to receive the new oil temp & pressure display.
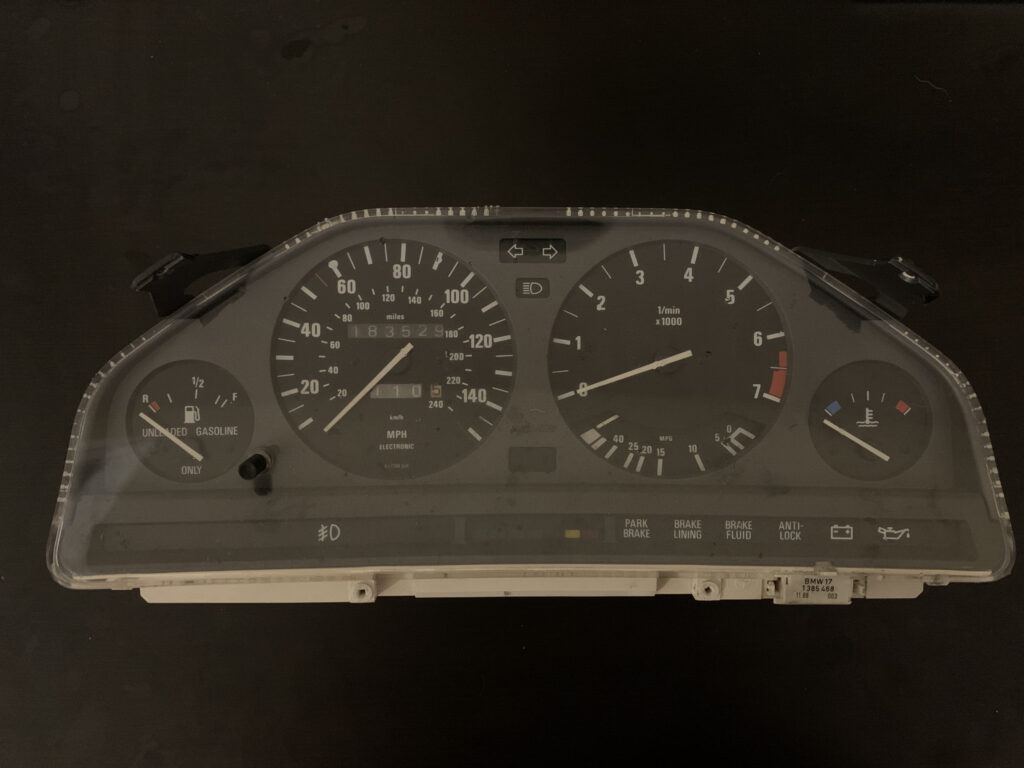
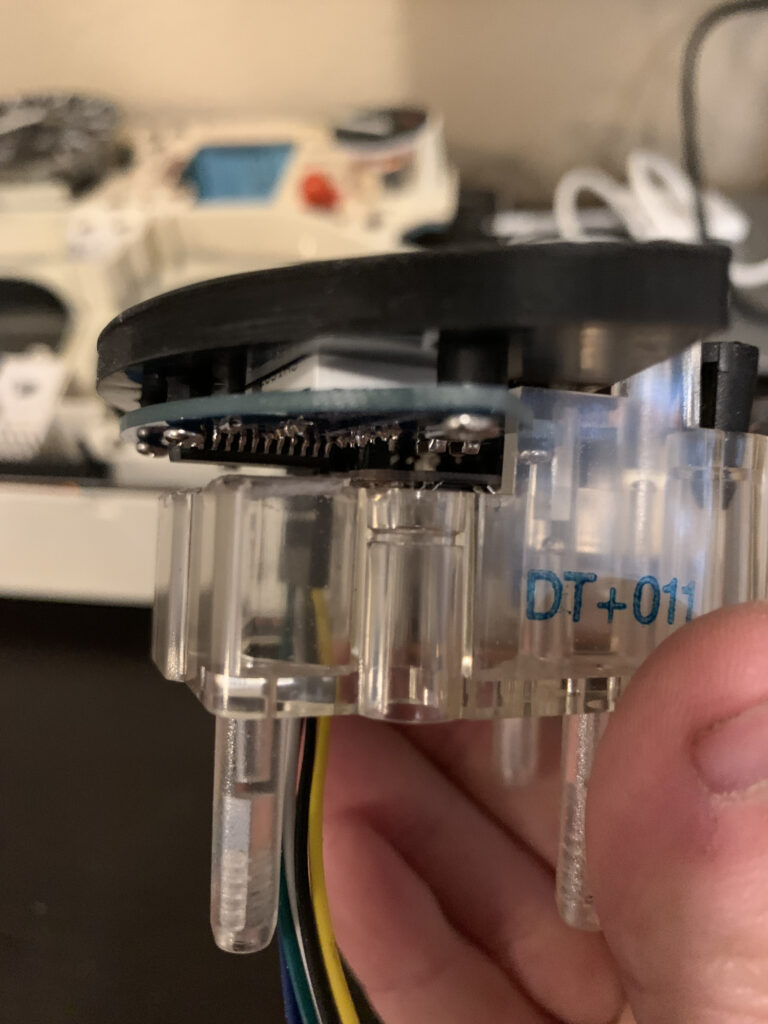
While the kit provides instructions on what needs to be trimmed on the plastic frame of the econometer, a lot of dremeling and test fitting were required to get the new oil gauge faceplate and associated circuit board to sit flush and ensure the small harness connector wasn’t getting pinched by the cluster housing. Then it was the same procedure drilling the cluster housing to feed the harness connector through. It wasn’t difficult per say, but there is always the risk of damaging the sensitive electronics in the cluster if not careful. Once everything was confirmed to be fitted correctly, the cluster could be reassembled while awaiting the rest of the kit to be fitted into place.
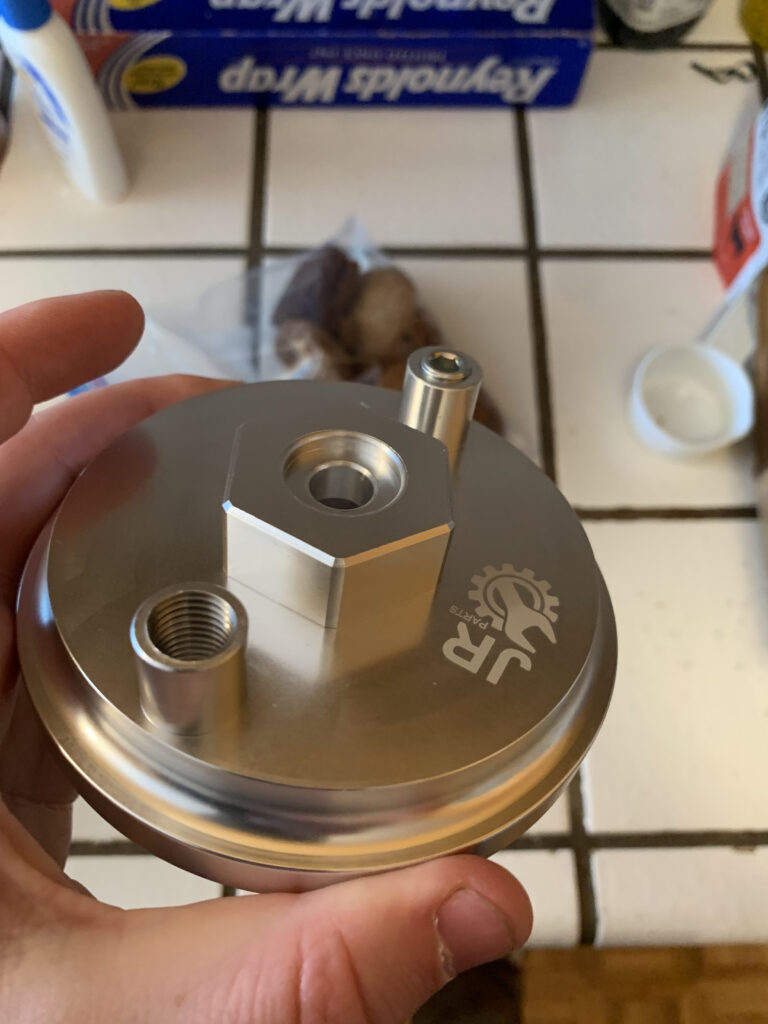
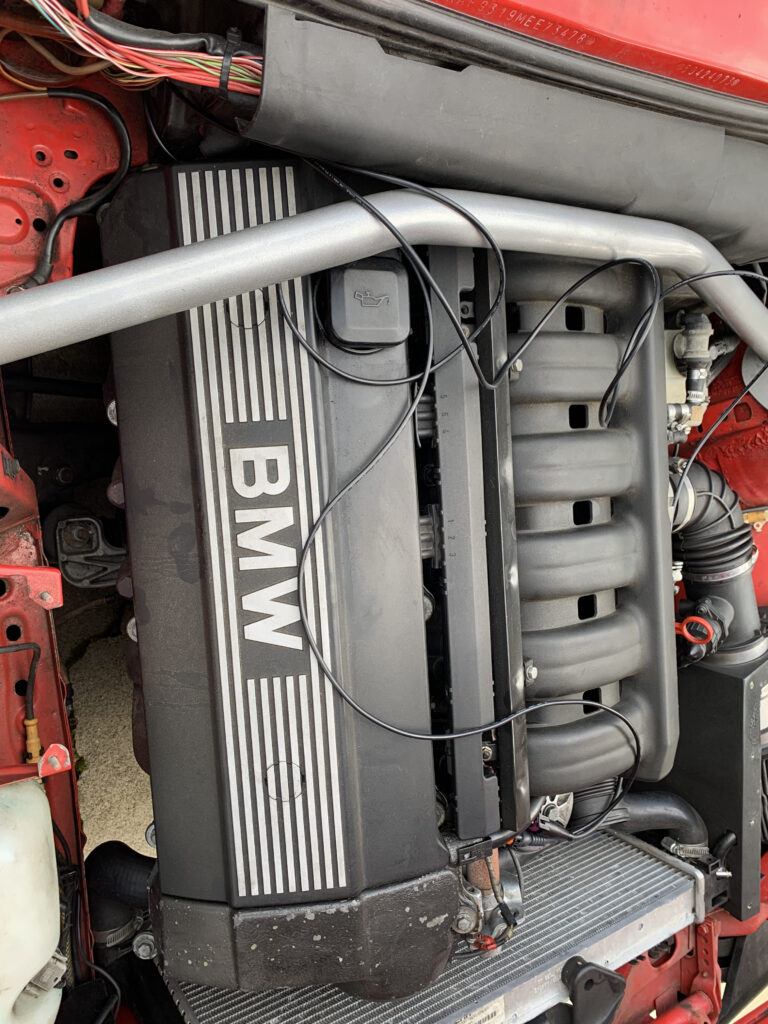
No OEM Cap FR FR
Next up was to assemble the oil filter cap with the dual sensor ports. Luckily this was fairly simple as the temperature sensor screws into its threaded port and seals with a crush washer, whereas the pressure sensor uses an NPT fitting, so you have to wrap it in the supplied teflon tape to prevent oil leaks. Usually most 80s & 90s BMW auxiliary gauge setups use an oil distribution block tucked under the manifold, so this was a quick and easy install and easily reversible.
Ironically it was the temp sensor crush washer that would end up leaking because the sealing surface was a smaller diameter than the washer itself. The simple fix is to instead use the crush washer for the oil pan drain plug which has a smaller outer diameter that better matches the sensor port.
Wire We’re In There
Now it was time to tackle the wiring of the new gauge setup. Like most backyard mechanics, electrical systems are a “proceed with caution” area for me after frying my fair share of electrical components in the past. Thankfully the gauge kit is relatively self contained, with the only splicing consisting of tapping power and ground from the switched radio wires.
The “choose your own adventure” came in the form of deciding how to feed the sensor wires into the cabin to meet up with the new gauge cluster connector. The instruction manual says to slice one of the grommets in the firewall near the brake booster and feed the wires through to the backside of the cluster, but I didn’t like that approach as I hate working under the dash, and also makes troubleshooting electrical problems tougher as the knee bolster and cluster have to be taken apart each time.
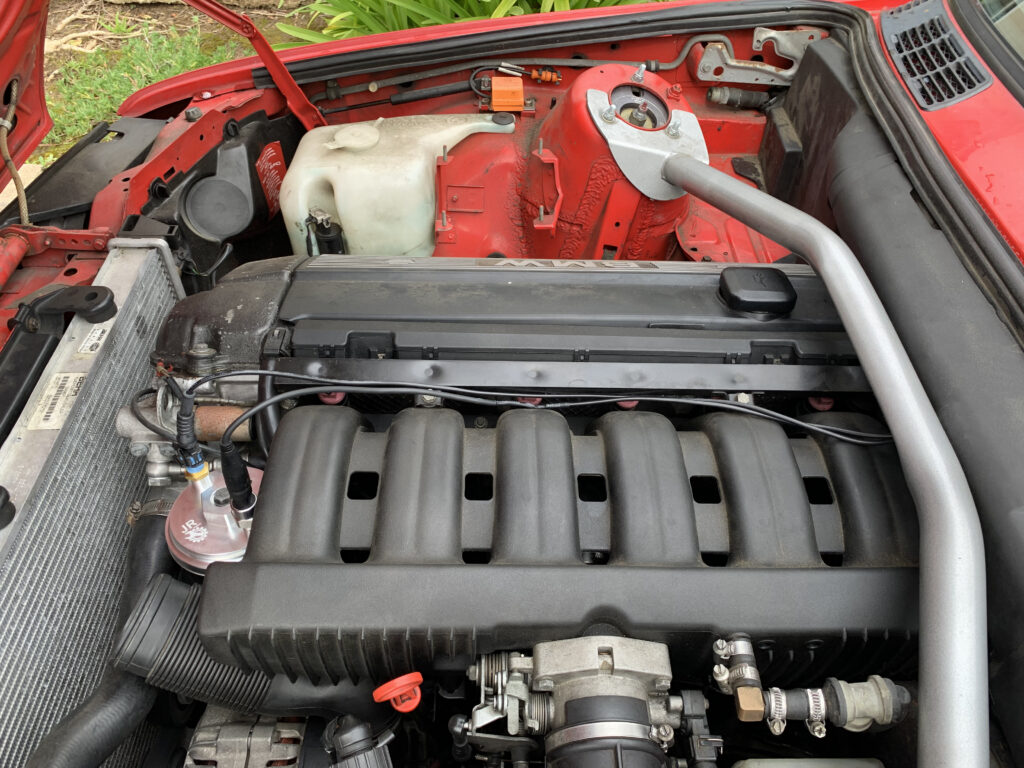
Since the kit comes with ample amounts of wire, I was able to route the wires through the ECU engine harness opening in the firewall, then snake the wires through the back side of the glovebox and radio deck to meet up with the cluster harness connector. As an added bonus, since my car has the 318is/M3 engine harness cover, most of the wiring is neatly tucked away aside from the run across the manifold into the oil filter cap. Everything was in position, so I tapped into the radio power supply wires and turned the key to fire up the car. Moment of truth!
Hold Your Horses
The engine started right up and the new oil temp and pressure gauges came to life. All seemed good until about 5 minutes later the display died. After some troubleshooting and pulling the cluster apart again, I suspected the main board in the cluster housing had fried something. Disheartened, I parked the car for the next week as I tried to figure out the issue.
One of my friends is an electronics whiz and he was able to pinpoint the problem as being the power regulator on the circuit board. Fortunately he said it was a cheap part that likely overheated. So he took the board home, replaced and resoldered a new power regulator onto the board, and I was back in business (JR Parts was also kind enough to send me a few spares as well in case an issue were to arise again)
So back to reassembling the cluster and getting everything reinstalled once again. Of course during the process I managed to snag one of the power wires in the intermediary harness…out came the soldering iron yet again. Eventually though I got everything buttoned up and the car was back in action with working oil temperature and pressure gauges.
The Real World Post-MTV
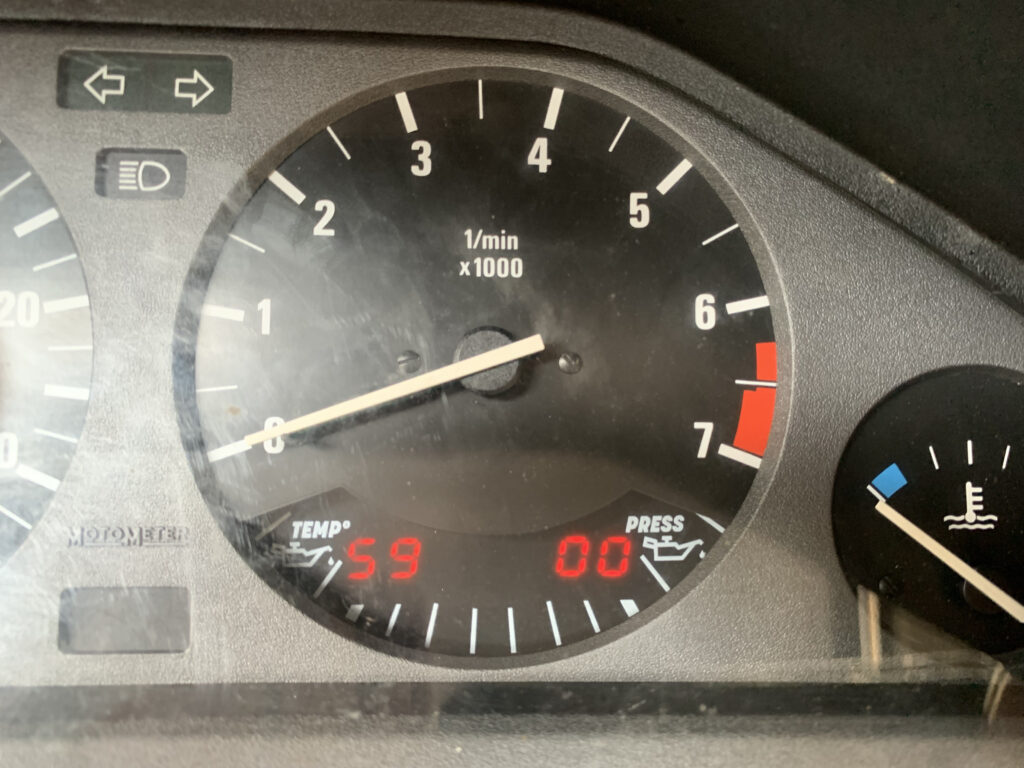
Now that I have oil pressure and temperature information, I have been able to learn more about the engine and what is deemed normal behavior. On cold startup the pressure is around 60 PSI and eventually settles around 10 PSI once hot. Pressure seems to consistently increase throughout the rev range, with 45-60 psi being the norm under load in the mid to upper RPMs.
Oil temperature was interesting to learn how long it truly takes to get up to operating range. Whereas the factory coolant gauge will take 5 to 10 minutes of normal driving to get up to temperature, the oil temperature takes another few minutes on top of that depending on the outside ambient temperature. Cruising around town I saw 190-200 degrees fahrenheit on the gauge, and it climbed up to around 215 degrees after flogging the car on the highway.
I have yet to try the gauge setup on track, so it’ll be interesting to see just how hot the oil gets and if I see any worrying pressure drops even with the baffled oil pan. For now I’m just happy it’s finally installed and working.
TRACK DAY UPDATE 5/10/2025: I took the car to Sears Point for a track day and finally had a chance to test the car’s oil temperature and pressure gauges.
During the morning session, which was in the low 70s F and a clear day, I saw a max oil temp of around 230 degrees. As the day progressed and the outside temperature increased to around 85 degrees, oil temperature peaked around 260 degrees during the afternoon sessions. This was using around 8 quarts (slight overfill) of 15w50 Mobil 1 synthetic oil on the good old 24v e36 engine.
Peak oil temperatures may have been slightly higher than expected as my car uses a skid plate that directly blocks airflow to the pan. I could have removed the skid plate to allow proper airflow the the fins on the oil pan, but I did not want to risk cracking the pan on the poor quality roads en route to the track. If some extra cooling is required with a skid plate, the Race Skids brand plates have ventilation reliefs cut into them unlike my Red46 skid plate.
Oil pressure seemed to stay in check, even during the high G carousel corner (Turn 6) which had readings in the high 40s to 50 PSI depending on my RPMs (I was too busy fighting the stock sport seat to pay attention for too long). For reference, most of my shifting was done around 6k occasionally, 6500 RPM coming out of the slower corners. The big contributor to the oil pressure not having any alarming drops was likely from installation of the trap door baffle.
After the Honeymoon Phase
Would I go through the effort of all this again? I really do enjoy the OEM plus appearance for a street car, and the install was straightforward outside of the tach/cluster modifications. For a dedicated track rat this would probably be too fancy, but then again, I’d have to deal with all the length of wiring associated with traditional analog gauges.
If I wanted an even simpler setup, JR Parts also offers other digital gauges that sit in the HVAC panel next to the defroster and hazard light switches. The reason I didn’t go with these initially was they were out of my sightline, but honestly they would have worked just fine and would have been even easier to install while keeping a factory look. If I add a live coolant temp gauge, I may go that route since my car still has two blank switch spots available.

Overall I do like how the finished product looks and works. Now that I’ve lived with it for a while, these would be the updates I would consider making to the setup as time goes on:
- 90 degree adapter fittings for the senders as they sit upright and have tight clearance to the hood when shut (at least for M5x & S5x e30 swaps) UPDATE: This looks to have been addressed with a new oil filter cap design.
- More robust connector setup for the middle wiring harness that joins the sensor connectors to the power source and the cluster connectors to prevent snagging the small wires from the board
- Readouts can be washed out and hard to see during the daytime compared to the rest of the cluster gauges, perhaps mild window tint or an anti-glare film over the cluster case
So far I’ve driven a few hundred miles with the new oil temp/pressure gauge setup and everything seems to be cooperating. If you’re looking for an OEM style setup and want a period correct appearance, then the JR Parts econometer digital oil temperature and pressure gauge checks the correct boxes. Even with the fiddliness of the small components, the install was very straightforward all things considered.
By now you’re wondering what is the damage to the wallet? For the gauge kit plus the oil filter cap, I spent $335 shipped to the USA at time of writing. I’m sure there are ways to install gauges for less, but I would say it’s a wash versus going the old school analog VDO route plus whichever aftermarket interior panel inlay you would use to mount the gauges themselves.
Having auxiliary gauges without a doubt adds an extra dose of sportiness to the old timer e30. More importantly though, I’m excited to see new products continuing to be developed for these cars so people can keep enjoying them for many more years to come.