Old cars make noises. No matter how diligently you try to quell each clunk or rattle, there’s bound to be a new one. That being said, it still hasn’t stopped me from chasing down an annoying clunk in the rear end of the red-mobile. Peering under the car one evening, I noticed the differential hanger bushing had separated. Regardless if this was my low speed clunk suspect, it would be wise to address the issue before it became a serious problem. The joys of a 26 year old car…
The AKG Approach
A BMW differential bushing is usually rubber, but years of road use and debris will eventually cause deterioration. Equipped only with a single bushing mount (as opposed to the dual ear diffs found on later generations of the 3-series), a modified e30 is going expedite the already short lifespan of the stock bushing. BMW actually has a couple of heavier duty bushings you can install into the e30’s rear diff cover that are less prone to tearing. You can use the rear bushing out of a 325ix which is solid rubber, or the webbed, but steel reinforced Z3-M bushing. Both are great options to keep the NVH levels close to stock, but recent price spikes mean these bushings retail for well over 250 dollars each. That’s a bit ridiculous, even by BMW standards.
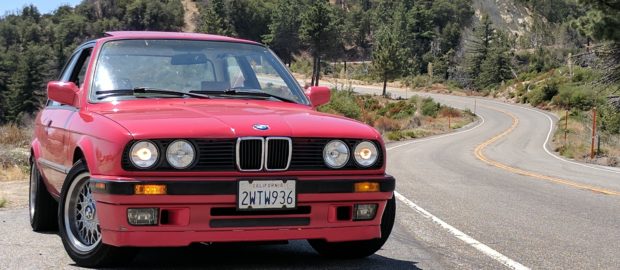
- The test subject taking a break on Mulholland.
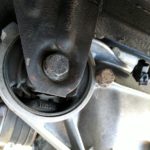
- Hmm…torn diff mount can’t be good.
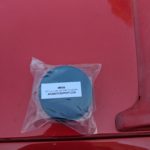
- AKG to the rescue. This softer 85a durometer bushing is a good choice for street applications.
Normally I’m not a proponent of polyurethane in a street car, however soft durometers can be quite reasonable for a daily driver. Over the years, AKG has been my choice when I’ve opted for polyurethane bushing. Their fitment is top notch, and they’re very helpful with any concerns one might have as a customer. When I needed an alternative to an overpriced factory diff bushing, I was pleased to find out that AKG offered a soft 85a polyurethane option. For $60 bucks, it was worth trying.
Sunday Afternoon Head Start
Someone who’s methodical and plans things out would have given themselves plenty of time to prep the car for this install, as the diff has to be somewhat removed for access. Knowing I had a few laundry list fixes for the e36, I tackled those items first to avoid having two projects going simultaneously. By the time I was done with the e36, it was 2:00pm on Sunday. Capturing the essence of Roadkill, what better way to move onto your next order of business than to work against the ticking clock.
Ideally I didn’t want to remove the diff entirely, as it’s tedious and weighs around 80 lbs. My solution to avoid that was to remove the bushing and subframe mounting bolts, then let the diff swing down, allowing ample room to access the torn bushing. Five bolts later, and the diff was able to flop around like a wooden trapeze toy.
The rubber bushing is press fit into the diff cover, and removal can be challenging, particularly since the rear cover is aluminum and easily damaged if not careful. Initially I tried to hacksaw the bushing out, but I wasn’t getting anywhere quickly. Out came the Sawzall, but there wasn’t enough room to make additional cuts. The diff cover would have to come off if I wanted to finish the same day.
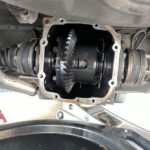
- With the diff unbolted from the subframe, I was able to remove the rear with plenty of access.
- The new bushing has been pressed into the rear diff cover. A benefit to poly bushings is that they’re easier to install than their rubber counterparts.
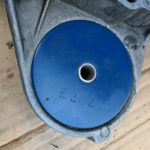
- As seen by the stamping, the bushing will also work in a z3 or 318ti, since they use the same rear trailing arm suspension .
With the fluid drained and bolts removed, the rear cover pops off with little fuss. Now that the cover could be placed on the workbench, Bruce helped finish the bushing removal with additional cutting, and the old bushing was out. The rear cover was cleaned and the new AKG bushing was pressed into place. Thankfully I had extra gear oil and an e30 differential gasket on hand, otherwise my progress would have been shafted. Using my favorite RTV, The Right Stuff, I coated the mating surfaces and the rear cover was bolted back onto the diff (with a little Blue Loctite of course). (2023 Update: Nowadays I simply install the gasket dry after cleaning both mating surfaces).
The fun really started trying to get the diff reinstalled on the subframe. The four subframe bolts are such a pain to get aligned due to limited space and poor visibility. I probably wasted an hour alone swearing and maneuvering the jack to get those stupid bolts to start threading. If you plan to remove an e30 differential, save yourself the headache and spend the 40 bucks on a stud conversion. The idea is that the studs will pop through the subframe and you’ll be able to easily thread a nut on top.
A New Discovery…and More Work Ahead
By 9pm, everything was back together and filled with fluid. Leaving the driveway I still heard my mysterious clunk, but at least my differential wasn’t going to tear itself loose. The 85a durometer seems to be compliant on the street, as I haven’t noticed any additional noises or vibrations. To test the durability further, I did some hard acceleration runs and the diff didn’t eject itself from the car, so I call that a successful install.
Upon inspecting the diff again for any loose bolts or leaks, I noticed there was fair amount play where the axles attach to the output flanges. With the rear end up in the air and the gearbox in neutral, both wheels spin in the same direction, as expected. However, with car in gear, the wheels spin in opposite directions, so I’m led to believe the LSD is worn out, especially when the other LSD cars in the fleet simply lock the wheels under meager arm power. Just when I thought the case of the mysterious clunk had gone cold, things have heated up again. Where’s a good David Caruso CSI Miami one-liner when you need one?
-JC
Interested in a quality replacement differential bushing for your e30? See what we used from AKG:

